3.3
141 review
Everyone
Content rating
0
Downloads


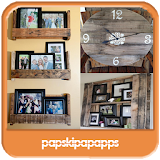
Woodworking Projects description
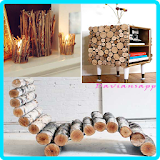
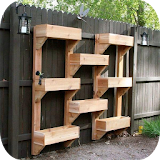
Working on easy diy wood projects can be a fantastic leisure activity both for yourself, but also for you and your kids together. But what exactly does it take to complete such project, what steps are involved, what tools required, etc. and what projects exactly are out there that qualify as an easy wood project?When choosing your project among the wide variety of diy woodworking projects available these days, try to start with a project that requires only '2 - dimensional' work - in other words, a piece of furniture that does not have any inside mechanical or wooden components, for example a rocket pony for your kids, or a simple chair, would qualify as such. On the contrary, a dresser drawer has e.g. drawers inside of it; it is therefore already a lot more difficult to visualize and also to actually build such piece of furniture.
What helps to choose a suitable easy woodworking project is to review some of the woodworking plans and software packages that can be bout nowadays. They make it easy to give you an idea of how easy a certain project really is, for example by indicating the amount of time it usually takes to complete a certain project, or by providing you the materials and tools list for a particular project.
In particular when building furniture with or for your children - or both, the choice of wood becomes very important; some of the pressure - treated wood that makes the wood suitable for becoming outside furniture, is very harmful for kids - so for kids furniture you should definitely look into furniture for the inside of your house, rather than e.g. garden furniture - as you can then use non-treated, natural wood.
After having selected your project, it is time to start. Measure the wood according to your assembly plan, then cut out the pieces according to the blueprints you are using. The more detailed the blueprints, the less room for mistakes as you will see. Cut all individual pieces first and lay them all out in front of you, instead o trying to assemble e.g. the leg - assembly first before having cut the table top, etc.
One easy woodworking project is for example a little kids - bench; the individual pieces hereby would be the cross legs, the seat- and top support, a brace, and of course the top itself. Work with the cutting list provided by the woodworking plan you work with - it gives you not only dimensions of each piece, but also quantities of each piece required.
After cutting all pieces, line them up according to print, and fasten them - preferably with screws or bolts, rather than nails. In particular for the easier - kids friendly wood projects, a hammer should stay away from reach of the kids - using screws and a screwdriver requires less immediate movement than using a hammer and nails. Now, start with the two leg assemblies first, then mount the brace to combine the two leg assemblies. After that, you bolt the seat assemblies and, finally, the top of the table; both, for seats and top you should definitely use stronger, at least 6-8 mm bolts with washers to assure an appropriate support.